
Creation of a test case is highly critical when it comes to ensuring the quality of a software. The purpose of a test case is to make sure that quality standards are met and that any bugs or problems are identified and corrected. Since test cases are highly specialized processes, test case management becomes extremely important, so that the entire process can be streamlined and can allow collaboration between members of the team.
Jira is popularly known as a project management and bug-tracking tool, but it can also be used for managing test cases. This article will explain how to create and manage test cases in Jira to streamline your testing processes and improve team collaboration.It will provide practical steps for setting up Jira for test case management and writing detailed test cases.
Moreover, you’ll also discover how to link test cases to user stories and bugs, report results, and use plugins for advanced features like traceability and test execution tracking. Let’s begin!
Test Case Lifecycle
The test case lifecycle is an aggregate of steps that ensure a proper procedure is followed from start to finish to test the quality of software.
- Creation: Test cases are written based on software requirements. They go in detail about the steps and what the expected results are.
- Planning: The test cases are organized and the execution plans are made. The team prioritizes them, schedules their execution, and assigns resources.
- Execution: Testers follow the test case steps to check the software. They also record the observed results(actual results).
- Reporting: The observed results are documented and reported. This includes whether the test passed or failed, any defects found, and any comments.
- Analysis: The results are used to analyze the stability of the software and it is checked if there’s any room for improvement.
- Retesting: Developers work on any issues that were reported and the software is tested again.
- Closure: A final report is made after the retesting and the test case is marked as complete.
Setting up Jira
To streamline the process and create better workflows, it is recommended to set up Jira in a way that suits your requirements for test case management. For example, it is not necessary to create a separate project, but it might be beneficial for creating a more organized workflow. To customize the workflow on Jira follow these steps:
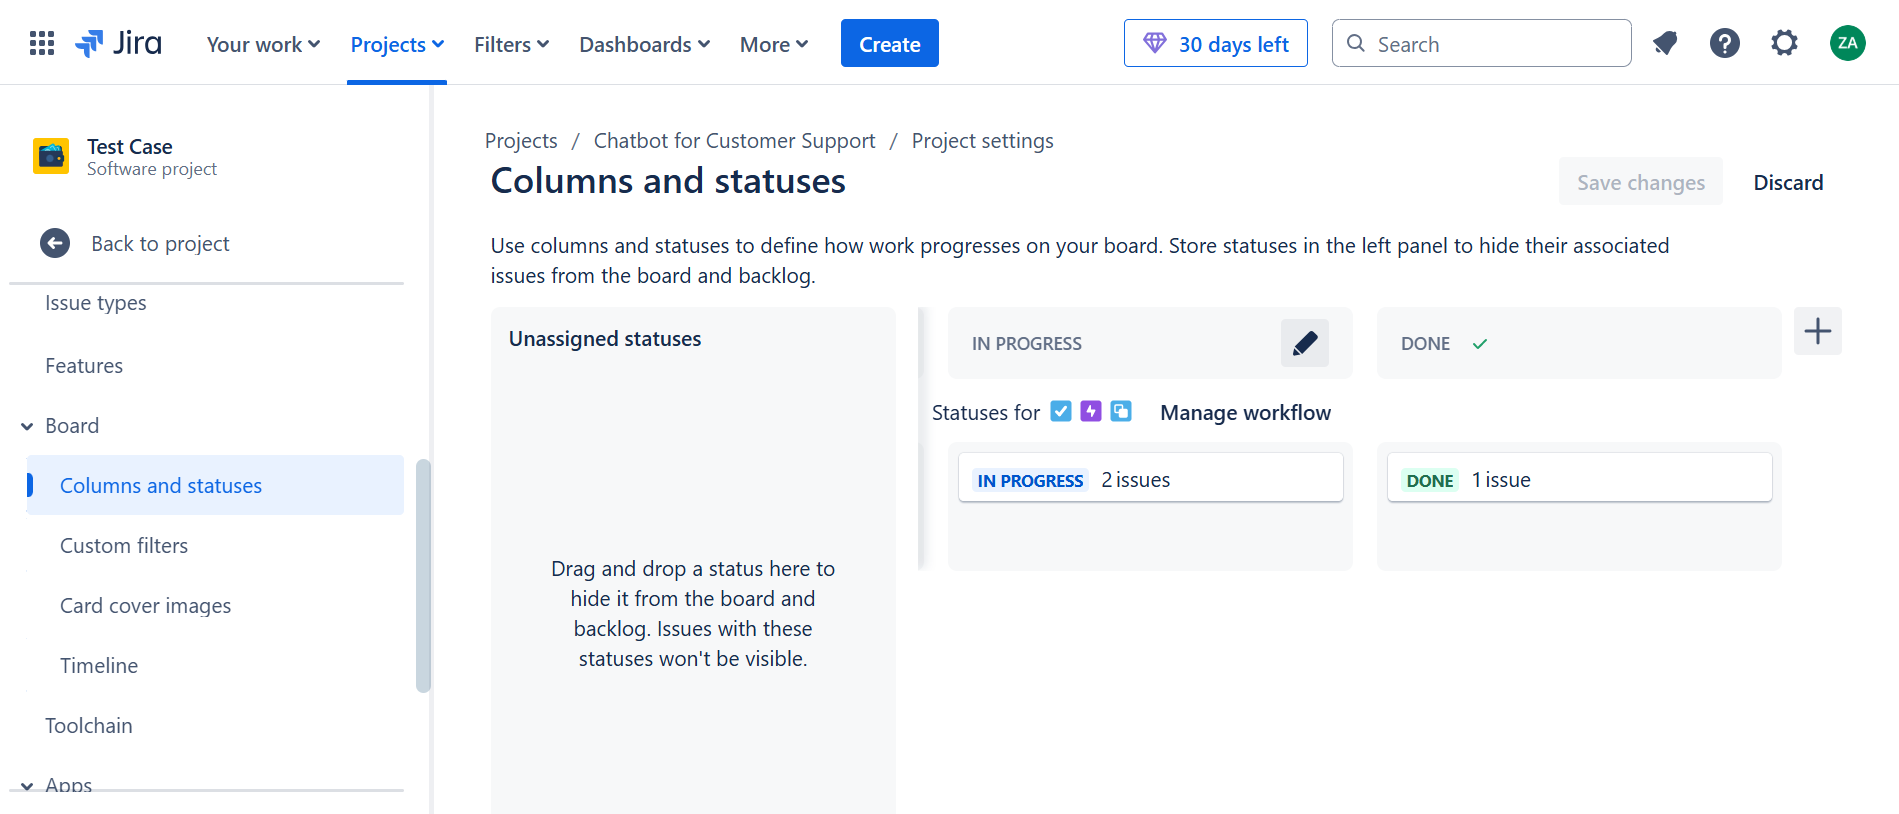
- Go to Project Settings: In your Jira project, click on Project Settings in the left-hand menu.
- Access Workflows: Navigate to Workflows or Board and click the icon under the Actions column for the workflow you want to edit.
- Add the Relevant Statuses: Add relevant statuses that reflect the stage of your testing process, such as: “ready for testing” or “in progress” etc.
- Set Transitions: Ensure transitions between statuses are flexible. Set them to All so any team member can update the status when needed.
Keep the workflows simple and straightforward, this will make it easier to collaborate and reduce the chances of missing steps. Only use additional transitions and statuses where they’re needed for the clarity of the team. If your primary focus is defects, consider setting up a separate workflow specifically for tracking bugs to ensure clear and effective management.
Step-by-Step Guide For Using Jira For A Test Case
This how you will use Jira to manage test cases:
Create A New Issue Type For Test Cases
Go to Jira settings
- Click on the gear icon on the top right corner and select Jira Settings, or click the Create button on the task bar on the top.
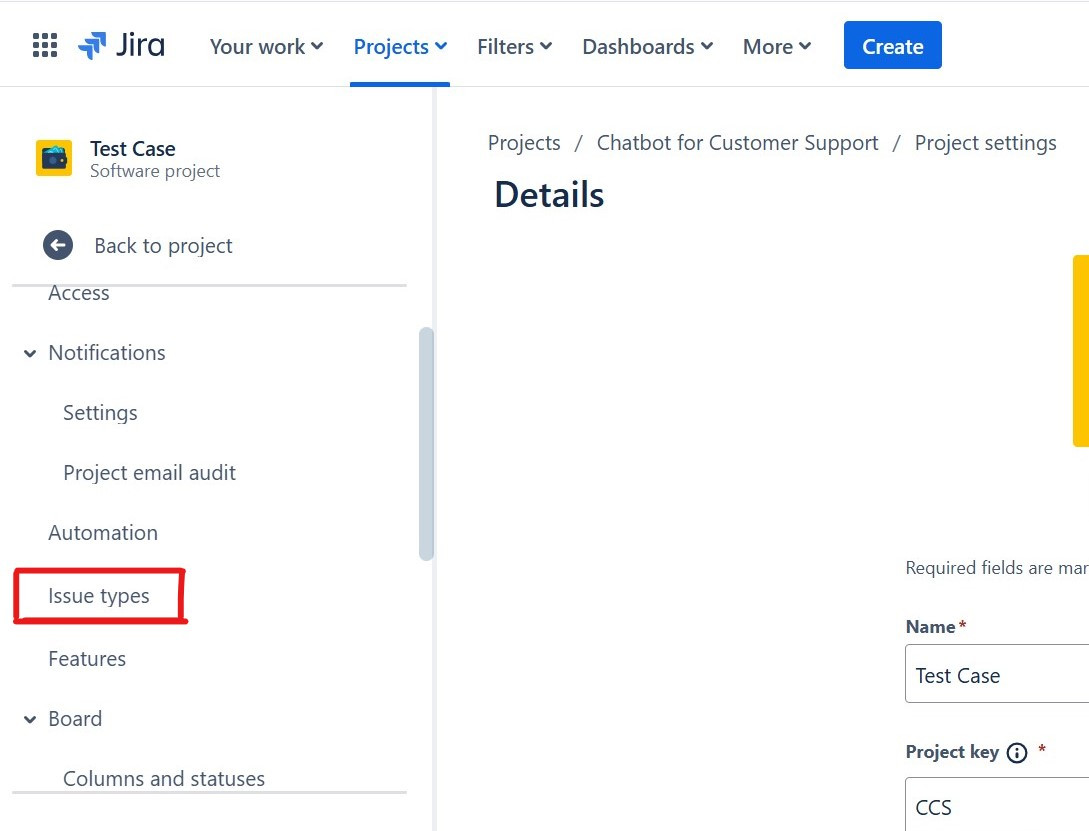
Navigate to Issue Types
- In the Issues section, click on Issue Types.
Create a New Issue Type
- Click on Add Issue Type.
- Give a name to your new issue type (e.g. Test Case).
- You can also add in a description
- Click Add.
Add The New Issue Type To Your Project
Go to Project Settings
- Open the project where you want to add the new issue type.
Go to Issue Type Scheme
- Click on Issue Type Scheme under Project Settings.
Edit the Issue Type Scheme
- Click on Edit and drag and drop the new Test Case issue type into your project’s scheme.
Make Custom Fields For Test Cases
To make your test cases more organized and detailed, add custom fields like Test Steps, Preconditions, Expected Results, etc.
Go to Screens
- Go to Jira Settings and look for Screens under Issues.
Create a New Screen
- Select Add Screen and give it a name, e.g. Test Case Screen.
- Select which custom fields you want to display in your test case issue (like Summary, Test Steps, Preconditions, Expected Results).
Link Screen with Issue Type
- Go to Screen Schemes.
- Select Add Screen Scheme, link it to your newly created screen.
- Then, go to Issue Type Screen Scheme and associate your Test Case issue type with the new screen.
Writing Test Cases In Jira
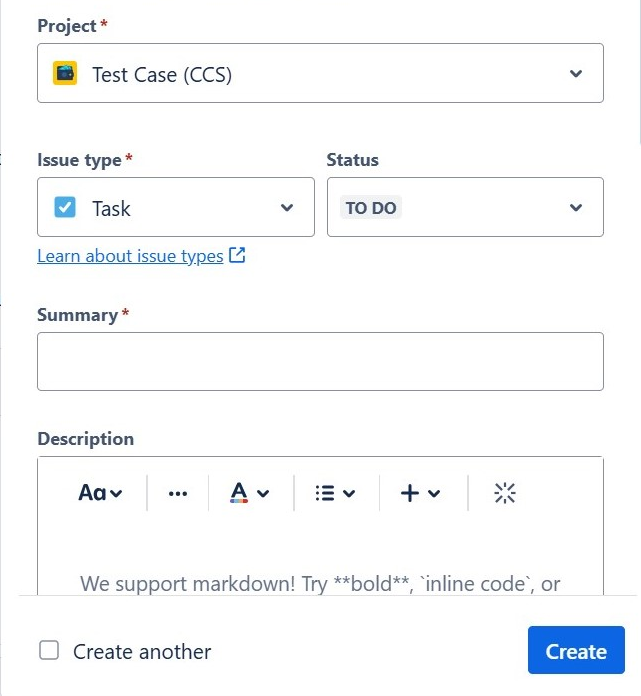
To create a test case, you use the same steps as creating a new issue. This is a simple template that you can use to write a test case:
- Summary: Provide a short description (e.g. Verify login functionality).
- Description: Detail what the test case will verify (e.g. Ensure that users can log in successfully with valid credentials).
- Preconditions: Write down any conditions before executing the test.
- Test Steps: Enumerate the steps for testers to follow.
- Expected Result: Describe the expected outcome for each step or the overall result.
- Actual Result: After execution, enter the actual result
Link Test Cases To User Stories Or Bugs
User stories are short, simple descriptions of a feature or functionality that outline what the user needs and why it's important. In other words, it describes a requirement for the system or software. Linking test cases to user stories is important to make sure these requirements are met. The following steps can be carried out to achieve this:
Create the User Story
- First, create the user story. To do this use the same method as shown above for creating a Jira issue type.
- Make sure that the user story contains clear criteria put forward by the end user and that it also describes the functionality or feature to be tested.
Create the Test Case as a Jira Issue
- Create the test case as a separate issue in Jira, typically using a custom issue type like "Test" or "Test Case."
- In the test case issue, define the testing steps, expected results, and any necessary preconditions.
Link the Test Case to the User Story
- Open the User Story (the issue type you created for the user story).
- Scroll down to the Issue Links section (usually found on the issue details page).
- Click Link and select the link type.
- Choose the Test Case issue from the list and link them.
- This establishes a direct connection between the user story and its related test case.
Similarly, linking test cases to bugs means connecting specific test scenarios with the defects or issues (bugs) found in the software, which makes retesting easier. To link test cases to bugs, follow these steps:
Create the Bug
- First, create a bug issue in Jira and describe the defect clearly. To do this you can follow the steps shown under creating a new issue.
Create the Test Case for the Bug
- If there is no test case yet, create a Test Case issue that will specifically validate the fix for the bug. Use the steps shown above if you’re not sure how to do this step. Include test steps that replicate the bug scenario to ensure it’s fixed.
Link the Test Case to the Bug
- Open the Bug Issue.
- Scroll down to the Issue Links section.
- Select Link and choose a link type such as “Tests” or “Is tested by.”
- Link the test case issue to the bug.
- This creates a relationship between the bug and its associated test case, making it easier to track and verify the fix.
Additionally in complex workflows, validation checks can be set up. These serve as checkpoints that ensure a user story cannot be marked as complete unless its associated bug is resolved.
Tools like JSU and ScriptRunner in Jira can be used for this purpose, as they serve as automated ways to prevent the completion of user stories until the linked issues are properly addressed.
Using Sub-Tasks For Test Cases
The purpose of sub-tasks in project management tools is to break down larger tasks or user stories into smaller, more manageable pieces of work. If your test case is only associated with a specific task or user story ( a single feature) you can organize it as a sub-task, if they are only relevant to that particular task or story and are not intended for reuse in other contexts.
To create sub-tasks:
Go to Project Settings
- Go to your project settings.
Add a Subtask Issue Type
- Under Issue Types, click Add Issue Type, and select Sub-task.
- Add this subtask as a test case under a related user story or task.
Configure Subtask Fields
- Like with standard issue types, configure custom fields for your sub-task test case, such as Test Steps and Expected Results.
Reporting Test Case Results
After executing the test case, you can report it using Jira as well! This allows easy tracking and reporting. For example, if you were fixing a bug, you can use the following steps to report the results:
Identify the Bug
- Test your application and locate a bug or issue that needs to be reported.
Capture a Screenshot
- Use your system’s built-in mechanism to capture a screenshot and annotate if required to report whatever you want to report.
Log into Jira
- After logging into Jira, navigate to the relevant project or issue.
Create a Sub-task
- Open the main task or user story in Jira.
- Click Create Sub-task.
- Choose Test Case Results or a similar sub-task type (depending on your workflow).
Add Bug Details
- Write a clear description of the bug including; Steps to reproduce, expected vs. actual results, and any error messages.
Attach Technical Information
- Include essential technical details manually like URL, OS, error log etc.
Attach the Screenshot
- Upload the saved screenshot to the sub-task by dragging it into the Attachments section or using the Add Attachment option.
Save the Sub-task
- Click Create or Save to finalize the sub-task.
Alternatively, you can use third-party apps:
Track Test Case Status:
- Use the statuses (e.g., Passed, Failed) to mark the outcome of test cases.
Generate Test Reports:
- With the right plugin (like RTM), you can get detailed reports on test execution and link the results back to requirements.
Why Use Jira?
Jira is used primarily as a bug-tracking tool, however, it is also used as a comprehensive project management solution. This means it can be used as a software for test cases. Here are all the reasons why you should consider using Jira for test cases:
- Agile Work Environment - Jira supports agile methodologies such as Scrum and Kanban, making it perfect for project management. Scrum teams can split huge projects into manageable small tasks, which allows better focus on specific objectives. Kanban teams allow visualization of workflow, setting work-in-progress limits and optimization of processes for maximum efficiency.
- Customizable Workflows - One of the best features of Jira is its flexibility when it comes to workflow creation and customization. Different stages and transitions for various issue types, such as tasks, sub-tasks and bugs can be defined. This ensures that workflows align with the team’s specific requirements and the needs of the project, providing better control over the process.
- Simple Issue Tracking and Management - Jira is an excellent platform for tracking and managing issues, since at a time multiple people and teams are working on the same project. Teams can create and assign issues, set priorities, log hours, and track progress all in one place.
- Integration with Apps and Tools - Perhaps the biggest advantage of using Jira is its compatibility with other management tools that allow an even more efficient workflow. This integration eliminates the need to switch between apps which can help save a lot of time.
- Inbuilt Reporting and Dashboards - Jira has reporting and dashboard functionality, which gives real-time insight into project progress. This ensures that projects are delivered timely and deadlines are met.
Plugins And Addons
Jira is one of the leading platforms for project management, but it is not specifically built for creating test cases. It is very helpful if a single software is used from the beginning to the end of the process, and so if test cases can also be created on the software, this will allow better coordination amongst the team.
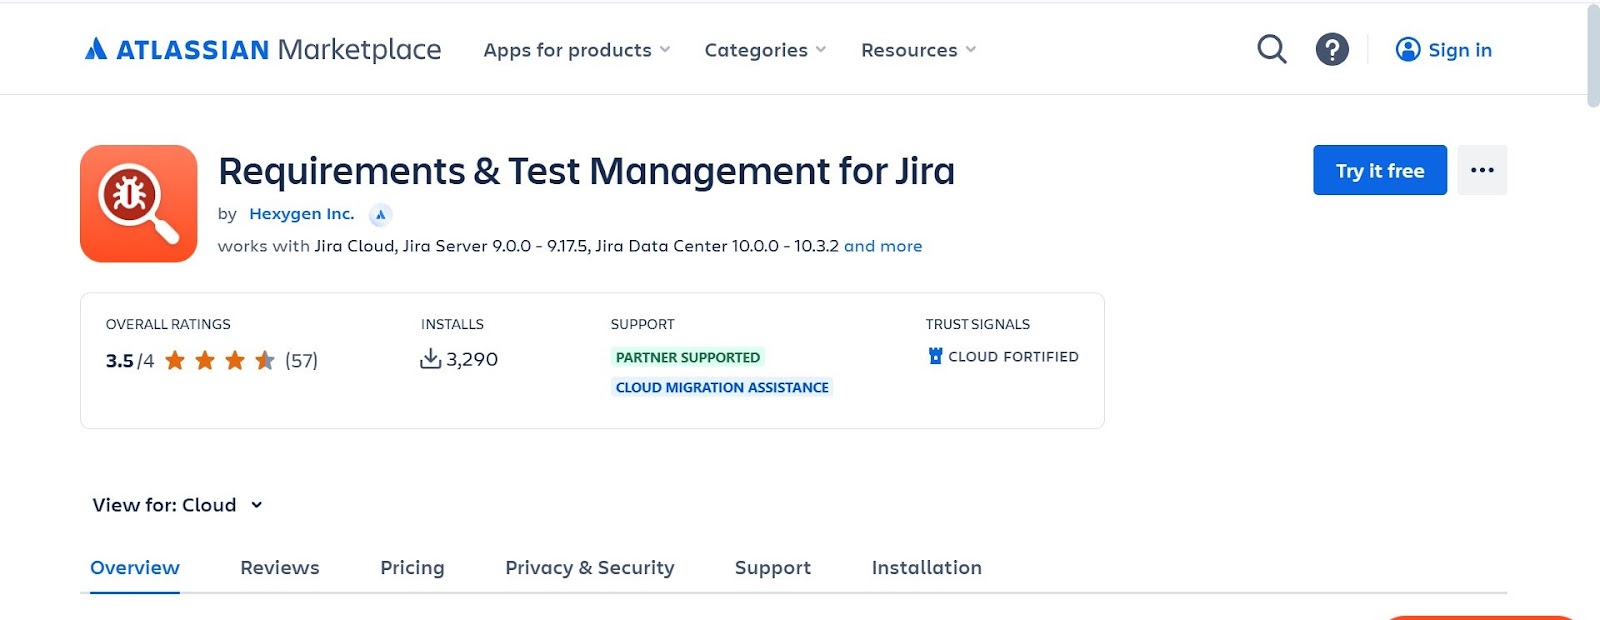
There are many third party apps tightly integrated with Jira that are designed to make the testing journey more effective. One such tool is Requirements and Test Management for Jira Cloud (RTM).
Here’s how you can use the tool:
Gather Requirements in Jira
- Use the Requirements module to define the requirements for your project.
- Specify requirement types (e.g., UI, Functional, Non-Functional, or Business Requirements).
- Add a summary and additional details.
- Organize requirements into folders and subfolders using the tree-view structure.
- Customize the structure to suit your project’s needs.
Link Tests to Requirements in Jira
- Create test cases in the Test Cases module or directly from a requirement view.
- Add detailed steps, including Preconditions, Actions, Expected Results, and Inputs.
- Use customizable panels to organize steps or import them from a CSV file for efficiency.
- In the Relations tab, track connections between requirements, test cases, and user stories
Check Test Traceability in Jira
- Open the Traceability Matrix to view relationships between project objects.
- Use JQL to customize what is displayed on the X and Y axes.
- Verify requirement coverage, test case inclusion in test plans, and defect tracking.
- Export traceability data to a CSV file for further analysis or reporting.
Design a Test Plan in Jira
- Create a test plan in the Test Plans module.
- Use the Details and Test Cases tabs to describe the plan and select test cases to include.
- Reuse test plans by re-executing them or creating new ones for selected test cases.
Track Test Executions in Jira
- Use the Test Executions module to monitor test plan progress with visual progress bars.
- View detailed results for individual test cases, including Assignees and Priorities.
- Access dedicated reports for test executions and individual test case performance.
- Filter results by various parameters and export data for documentation.
Report Test Results in Jira
- When a test case fails, create a defect to document the issue.
- Add comments, screenshots, and log files to communicate with developers.
- Link defects to other testing objects to streamline tracking and resolution.
- Use the Requirement Coverage report to confirm all requirements are covered by test cases and identify any problems.
Other plugins can be used to report the results to make other steps of the process more streamlined.
Best Practices To Create A Test Case In Jira
Now that you know how to create a test case in Jira, here are some of the best practices that can help you perform the task with greater efficiency:
- Create a Dedicated Issue Type for Test Case - While Jira allows setting up test cases as regular issues or subtasks, it is recommended to have a separate type of issue for this purpose because it will provide more organization and clarity. You can configure this using Jira plugins or testing apps for test management.
- Name it Clearly - Name each test case descriptively and meaningfully with regards to its purpose. Clear naming conventions make it easier for team members to locate and understand the test's objectives.
- Make Sure Requirements are Met - Ensure test cases cover all functionalities and requirements. Use the traceability features in Jira to link test cases to user stories, requirements, or bugs for improved tracking and validation.
- Outline Preconditions - Specify any necessary preconditions or setup steps before running the test. This ensures consistency across test executions and avoids confusion.
- Write Detailed Steps - Provide step-by-step instructions for executing the test. Use simple and unambiguous language so any tester, regardless of experience, can follow the procedure accurately.
- Focus on Reusability - Design test cases to be reusable across similar functionalities or scenarios. This approach reduces redundancy, improves efficiency, and supports ongoing testing efforts.
- Beyond the Basics - Extend your test scenarios to include edge cases, negative testing, and unexpected inputs. This ensures that the testing is done extensively and hidden problems that are only revealed in non-ideal conditions can be identified.
- Expected Results for Each Step - Provide expected outcomes for every step of the test case. This helps to clarify success criteria and makes it easier to identify failures.
- Use Custom FIelds - Jira gives you the opportunity to customize your test case so make full use of that. This improves searchability and enables efficient filtering as it organizes the workflow in amore efficient way.
- Incorporate Automation When Possible - If automation is part of your process, link your Jira test cases to automated tests. This integration enhances workflows, reduces manual effort, and provides quicker feedback.
- Prioritize and Rank Test Cases - Prioritize test cases on the basis of their criticality to the system or project. During early testing phases, focus on the high-priority cases or the ones that present major risks.
Key Takeaways
- The test case life cycle involves several steps and is a complex process. It involves creation, planning, execution, reporting, analysis, retesting, and closure.
- Jira allows customization for test case management by adding relevant statuses, transitions, and simplifying workflows which allows better collaboration between the team members.
- A dedicated issue type can be created for the test case, with the custom fields Test Steps, Preconditions, and Expected Results to organize details.
- Test cases can be linked with user stories and bugs for better traceability and easier processes.
- Sub-tasks can be used for feature-specific or task-specific test cases to keep them clear and focused.
- Statuses like Passed and Failed enable one to report a test result in Jira; some plugins extend this functionality with tracking and reporting dashboards.
- Some plugins, such as RTM, enhance the functionality of Jira for managing, tracing, and tracking requirements.

